DIY Guide for Professional-Looking Nails at Home

Venalisa makes nail products so you can do your nails at home like in a salon. They’ve got gel polish, builder gels, fancy effects like cat-eye looks, and top coats. In this blog, you’ll get to know about their best kit that you need to get started.
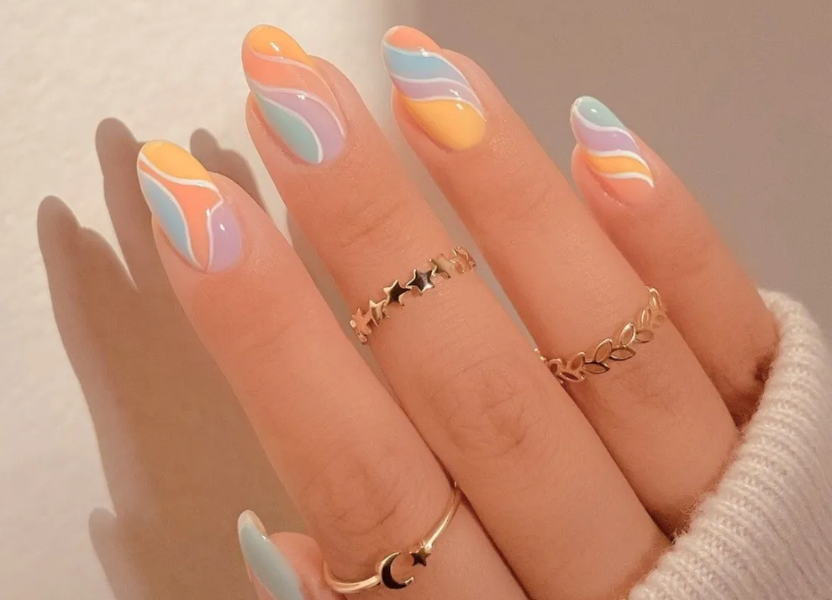
Getting your nails done just right is an art, an actual art. I’ve been obsessed with nail polish ever since I hit my teenage years, and I know there are so many girls and women out there who love it too. These days, the craze for perfectly done nails has become a trend. Every influencer is showing off long, intricate designs that look so clean and aesthetically pleasing. And of course, every other girl who sees that wants the same. But here’s the catch: those nails usually come from high-end salons, and not everyone can afford them.
So why not skip the salon visit and create your own nail salon at home? Applying nail polish isn’t that hard; you just need to learn a few tricks and know which mistakes to avoid. Also, having a good kit to get started makes all the difference. This blog will guide you through it all. Keep reading, because this might be exactly what you’ve been looking for.
Prepping Your Nails
Before you even touch the polish, the most important step is prepping your nails. Think of it like laying the foundation before painting a wall…if the base isn’t ready, the final look won’t last long. Here’s how to do it properly:
Clean your nails thoroughly: Start by washing your hands with soap and warm water to remove dirt, oil, or lotion that can stop the polish from sticking. If you’ve had old polish on, use a gentle, acetone-free remover so your nails don’t dry out.
Trim and clip your nails: Decide on the length you want. If you like short, neat nails, trim them evenly. For longer nails, just snip the very tips to get rid of splits or weak edges. Always trim straight across and then slightly round the corners to prevent breakage.
Shape with a nail file: Use a nail file to smooth rough edges…oval, square, almond, or whatever you prefer. Remember to file in one direction only (not back and forth), because sawing weakens the nail and causes splitting.
Push back your cuticles: Soften your cuticles by soaking your fingers in warm water for 2–3 minutes. Then, gently push them back with a cuticle stick or pusher. Don’t cut them; cuticles protect your nails from bacteria. Just clean the edges so your nails look neat.
Buff the surface: Take a nail buffer and lightly buff the top of each nail. This smooths ridges and gives the polish a clean surface to stick to. Be gentle as buffing too much can thin your nails.
Applying Gel Polish Step by Step
Once your nails are prepped, it’s time for the fun part…applying the polish. Gel polish gives that glossy, salon-quality look, but the trick is applying it the right way. Here’s how to do it like a pro:
Start with a Base Coat: Apply a thin, even layer of base coat to each nail. This helps the gel color stick better and also protects your natural nails from staining. Don’t rush; make sure the coat covers the entire nail but avoids flooding the cuticles. Always cap the free edge (the tip of your nail) by swiping the brush across it.
Apply the Gel Polish in Thin Layers: Wipe excess polish from the brush so you’re only applying a thin layer. Paint each nail carefully, starting from the middle and moving outward. Less is more. Thick layers won’t cure properly and can wrinkle or peel off.
Cure Under the UV/LED Lamp: After each coat, cure your nails under the lamp (usually 30–60 seconds for LED or 2 minutes for UV, depending on your lamp and polish). Don’t skip this step, gel polish needs light to harden and set. Cure your thumbs separately to make sure the polish doesn’t slide or wrinkle while curing.
Repeat for Color Intensity: Apply 2–3 thin coats of gel polish, curing after each one. This builds up the color evenly and makes it last longer.
Finish with a Top Coat: Apply a thin layer of top coat to seal everything in. Cure it under the lamp just like before. The top coat gives your nails that high-shine, glossy finish and protects against chips. After curing the top coat, wipe your nails with a lint-free wipe soaked in rubbing alcohol to remove the sticky residue (called the inhibition layer).
Mistakes to Avoid
Here are all the mistakes that many make. Read them carefully and avoid making them:
- Not cleaning oils off: If your nails are greasy, the polish won’t stick.
- Shaking the Polish bottle: That just adds bubbles. Roll it in your hands instead.
- Touching your nails mid-process: Smudges and fingerprints ruin the look.
- Flooding your cuticles: If polish touches skin, it lifts off faster.
- Skipping the top coat: That’s your shield; without it, chips come quick.
- Not moisturizing after: Dry cuticles can ruin the whole vibe.
Recommended Kit to Get Started
Practice is the key to perfection, and that only happens when you’ve got a bunch of colors to practice with. Why not start with this kit from Venalisa? The brand has one of the best nail collections, offering safe formulas and gorgeous shades that don’t cause harm or allergic reactions. From their wide range, I’ve found the perfect kit you can buy to start practicing right at home.
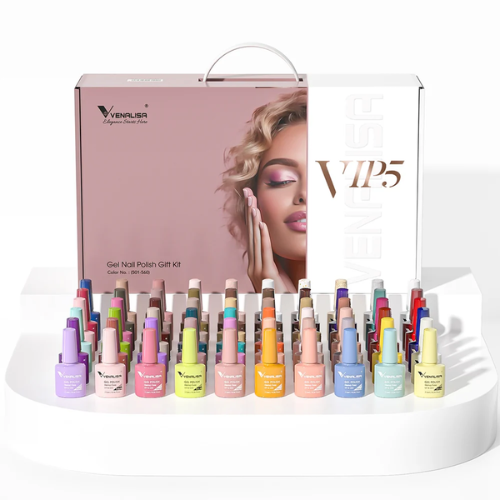
VIP5 Gel Polish Kit 60 Colors TPO Free Hema Free
The Venalisa VIP5 Gel Polish Kit is like having your own nail salon at home. Inside the box, you get 60 different colors to play with, so you can change your nail look whenever you feel like it. The polish is gentle on your nails, so it’s less likely to irritate. Once cured under a UV or LED lamp, your nails come out looking shiny, just like you’d expect from a professional salon.
What’s Inside & How It Helps
Here’s everything that comes with the kit and why it matters:
- 60 Gel Polish Bottles (7.5 ml each): A huge variety of colors, so you never run out of choices.
- Base Coat: Prepares your nails and makes the polish stick better.
- Reinforce Gel: Adds extra strength so your nails don’t break easily.
- Top Coats (Glossy + Matte): Seal the color and let you pick between a shiny or matte finish.
- Primer: Helps prevent peeling or lifting of the polish.
- Color Card: Shows all 60 shades in one place, so picking is easier.
Features
Here are all of its features:
- Gentle formula: HEMA-free and TPO-free, making it safer for sensitive nails.
- Long-lasting: Your manicure can stay fresh for over 3 weeks.
- Quick curing: Dries fast (30–60 seconds) under a UV or LED lamp.
- Safe & certified: Tested and certified for safety.
- Complete package: 65 pieces in total, giving you everything you need to do pro-level nails at home.
With the help of this kit, you won’t have to book an appointment every time there’s an event just to get your nails done. Going to the salon not only costs a lot of money but also takes up so much time. That’s why learning to do it yourself is the best option. Even if you’re not good at it in the beginning, just start…make mistakes, because that will only help you get better. And with this kit, your nails will always shine.
Venalisa runs an affiliate program, and we are affiliated with them. As an affiliate partner, I am excited to share this kit with you. To get a discount, click on this link, and help us earn a small commission at no additional cost to you.
Stay tuned to ChuckleCraft for more updates on new nail polish kits from Venalisa.
Recent Blogs
-

AWOL Vision Projector Review: Is It the Right Choice for Your Home Theater?
-
Smooth Finish Coffee Review: Is This the Perfect Morning Brew?
-
SkinSpan™ System Review: A New Approach to Anti-Aging Skincare
-
Realistic Lightsabers Superneox Fans Keep Coming Back To
-
Top Abbode Home Décor Picks for Stylish Living